This is how to change a blower motor inside of your home furnace or air conditioning, properly and to last. A step by step tutorial.

Make sure all the power is turned off

The first thing you need to do is remove the panels if there not already off.

Now move anything that is mounted in the way of the blower motor sliding out. I.e.: circuit board, flue pipe, door switch or possibly even another panel. Move the items but leave all the wires attached, just UN screw them and bend them safely out of the way. Be Careful not to damage anything while moving them.

Las Vegas Air Logo

Now cut all the wires going to the blower motor.

Now un-screw the blower housing, there’s usually 1 screw on top and one on the bottom 5/16ths in size.

Now pull firmly on the blower housing and it as long as you have taken out all the mounting screws it will come out. Take the entire blower assembly out to the driveway where you can work on it safely.

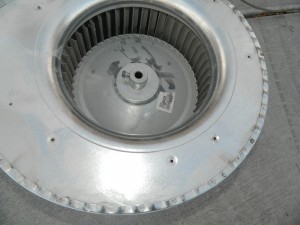
Set the housing on the ground with the back of the motor face down on the cement. You will be looking at the blower hub face up.

Loosen the locknut on the hub, use a small crescent wrench and turn the nut ccw.

Sand the entire exposed motor shaft with sand paper, then spray the shaft with wd-40 or apply oil.

Flip over the entire housing so the motor faces up.

Now remove the mounting screws holding in the motor brackets.

Cut all the motor wires now.

Flip the housing over again.

Now straddle the housing with your legs and squeeze in with your legs to secure the housing while so you can pull with your hands to remove the motor. If this way fails try using a small crescent wrench to twist the motor shaft back and forth rapidly while pulling on the motor at the same time. If all that fails you need to get a wheel puller.

Once motor pulls out of the housing inspect the wheel if it was damaged even the slightest it may need replaced also.

Now set your old motor next to the new one shaft up.

Now loosen the 3 eared brackets around the old motor and put it on the new motor exactly as it was on the old one. (Note: Make sure it’s the same length from the shaft end of the motor body as it was mounted on the old one.)

Now put the new motor with the bracket assembled shaft down into the blower assembly.

Screw down the motor with the bolts that came out. (Note: Do not over tighten these. Tight is tight enough)

Now replace the capacitor with a new one that is the proper size for the new motor.

Put the 2 brown wires from the new motor to the new capacitor 1 brown wire per terminal.

Now flip the housing again but this time set it down on its side, round part down.

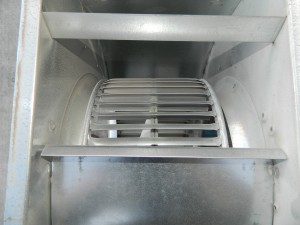
Now center the blower wheel in between the two metal sides.

Where Your Concerns Meet our Solutions

Now spin the blower wheel on the shaft until the nut is directly over the flat spot, and then use a small crescent to turn the nut righty tightly until it’s tight and you’re sure it won’t move.

Now give the nut another ¼ turn. Because you didn’t tighten it enough yet.

Double check that the blower wheel is mounted securely in between both sides of the housing and that the wheel can spin freely and with no wobble.

Now carry the housing back inside to the furnace.

Slide the housing into the rails exactly as you pulled it out. Be sure the rails on top and bottom slide through the proper grooves. (Note: I plant two feet securely then grab the housing from the top and bottom and angle the front in towards the side as I push. When you get close gently set the front bottom side inside the bottom grove but just ever so slightly then tilt the top in until it makes its way under the top grove. Now push in and start tilting the entire assembly towards the coil to teeter it and put pressure on the front to go out. This will make sure the top and bottom rails make it past the back grooves.)

Screw the housing back in with the 5/16 screws that came out.

Re-mount all the items you had to move to get the motor out.

Now run the new blower motors wires through the proper chassis to get to the circuit board.

Remove the white wire that’s dangling from the Neutral of the board and plug the new motors white wire there.

Now you have a red wire dangling pull that off and put the new red wire in that spot which should be heat or low.

Now pull off the black wire and put the new motors black wire to that spot which should be cool or high.

Now that is how you change a blower motor in a furnace.

Let’s check to be sure it’s the right motor, i.e.: big enough to spin that wheel and not over amp.

Put your amp probe on the black wire of the blower motor and set it to AAC

Now put the blower door on.

Give the machine power and turn it back on in air conditioning mode.

If the motor pulls higher amps than its nameplate rating, you need to take the motor back out and install a bigger blower motor to handle the weight of this blower wheel.

If the motor starts up and pulls under its nameplate amp rating, check the rotation. (Note: to check the rotation kill the power and watch the blade slow down or just watch it start.)

If your rotation is good then pack it up because you are done with this motor.

You have just completed what most men cannot, you have just repaired your air conditioner and if you followed all the steps right you have done a fine just.

Before we celebrate go to end test page to verify that the system is working at 100%

Go tell all your friends about “The Repair Matrix”

© Copyright Las Vegas Air Conditioning